Page 1 of 2
Fixing up a used M2
Posted: Thu Feb 11, 2016 1:56 am
by Karl_Williams
I lucked out and bought a used M2 for $200 Canadian ($140 US). The previous owner wasn't skilled mechanically or with firmware and managed to destroy the entire extruder system. I originally thought that the Rambo board was destroyed but it turned out that all of the fuses were blown. I ordered the V4 Extruder upgrade, geared stepper, extruder wiring harness, Rambo 1.3 board and Metal case, Boro glass plate and a few other things. I'm about to put her back together so I'll post with progress photos as I go. This will be my second M2. My first M2 has the dual power supply and has been printing perfectly for almost 3 year now.

Karl
Re: Fixing up a used M2
Posted: Thu Feb 11, 2016 2:17 am
by Jules
You lucky duck!
Hell of a deal!

Re: Fixing up a used M2
Posted: Fri Feb 12, 2016 7:46 pm
by Karl_Williams
I got some work done on the M2 rebuild last night

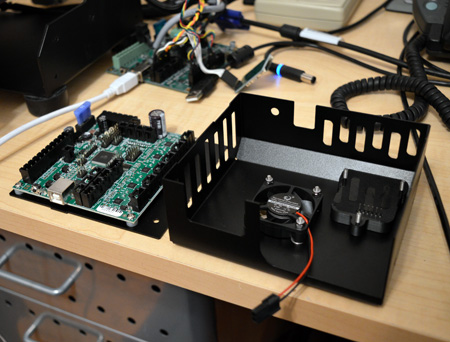
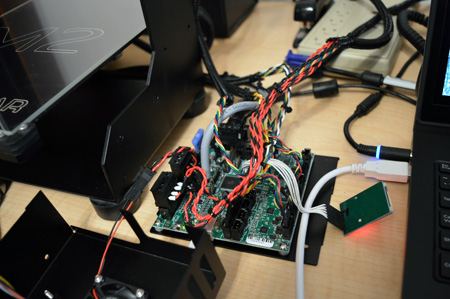
Mounted the Rambo board in the new metal case:
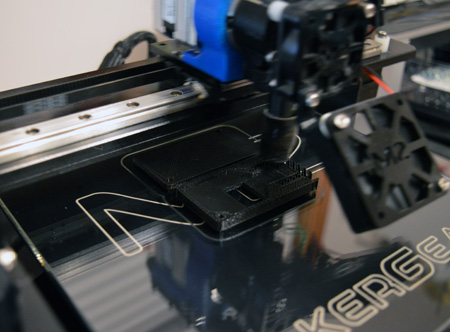
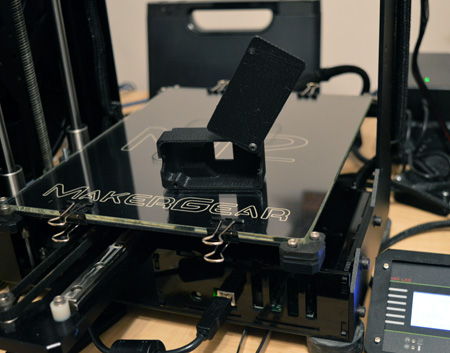
Printed the V4 wiring box on my working M2:
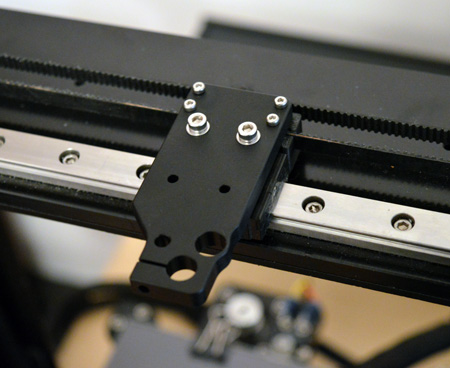
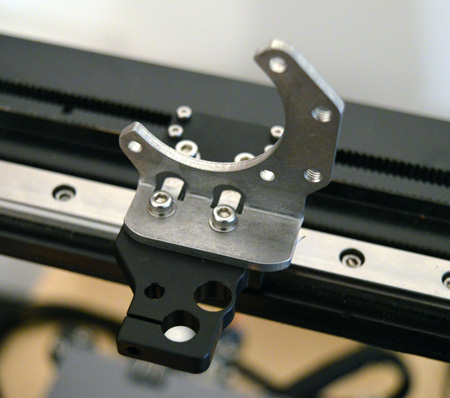
Attached the V4 mounting plate:
Attached the metal motor mount:
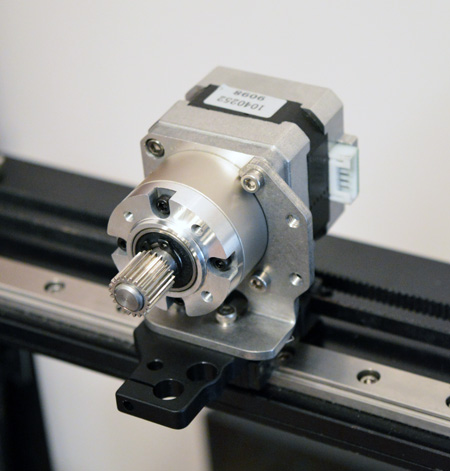
Mounted the geared stepper:
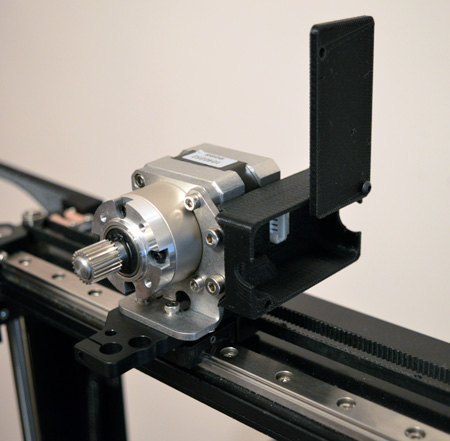
Attached the wiring box:
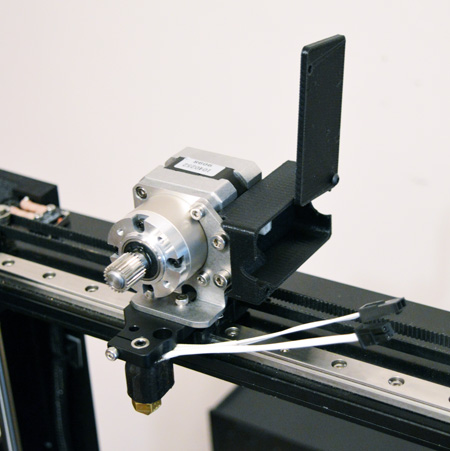
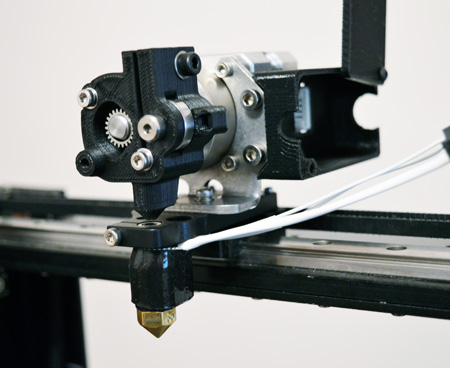
Mounted the V4 hotend:
Filament guide attached to stepper gear box:
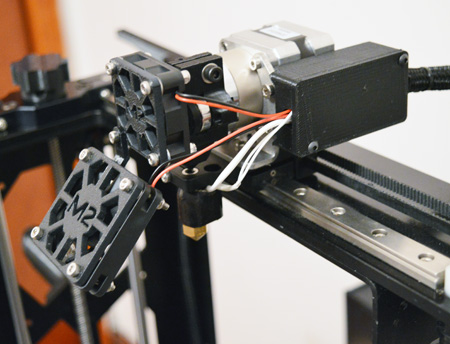
Keeping it cool:

Extruder harness wired up with connectors inside the box:
The Next steps will be to:
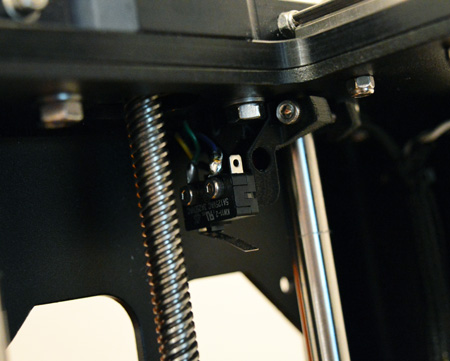
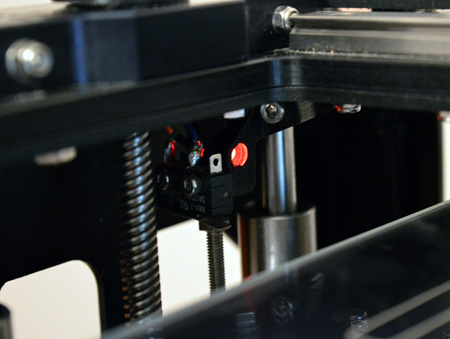
1. Attach the new Z-Axis endstop
2. Wire everything to the controller
3. Update the firmware
4. Level the bed
5. Set Z height
6. Test print!
Re: Fixing up a used M2
Posted: Fri Feb 12, 2016 9:32 pm
by Tim
Looking good so far! So clean and shiny. . .
Re: Fixing up a used M2
Posted: Sun Feb 14, 2016 6:25 am
by Karl_Williams
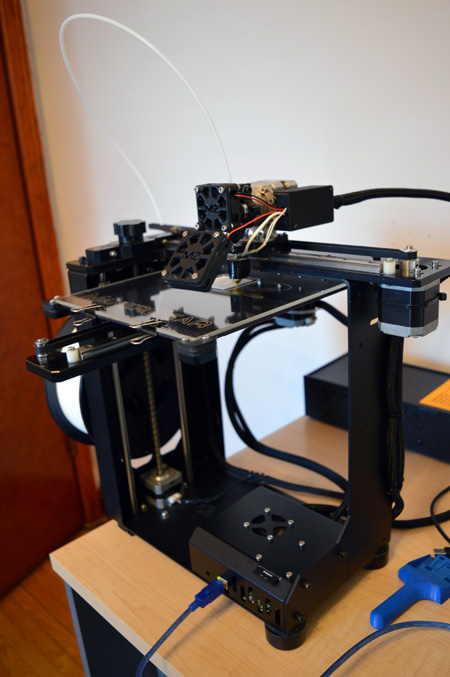
The M2 upgrades are done and the prints are looking great
I'm really loving the V4 upgrade.
Added the new Z-Axis end stop:
Wired up the new Rambo board:
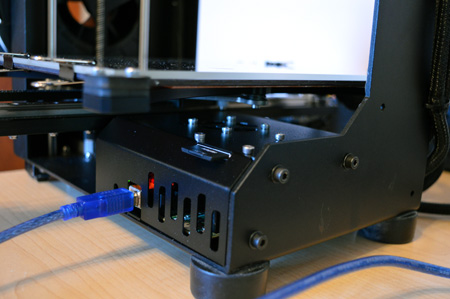
Mounted the electronics in the metal enclosure and attached it to the frame. Uploaded the firmware:
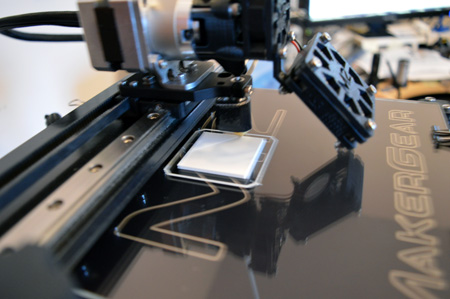
Leveled the bed and set the Z height. Set up the M2 profile in Simplify3D and printed a test object:
All I need to do now is add some white lithium to the X and Y rails.
The M2 is the best!
Re: Fixing up a used M2
Posted: Sun Feb 14, 2016 8:17 pm
by insta
Ditch the fan guards
Re: Fixing up a used M2
Posted: Mon Feb 15, 2016 8:13 am
by Vandal968
Excellent score. And yes, the factory fan guards are garbage. Loud garbage.
Cheers,c
Re: Fixing up a used M2
Posted: Mon Feb 15, 2016 3:55 pm
by sthone
That new metal electronics case is sexy I might have to get me a few of those.

Aren't you just suppose to oil the rails not grease them?
Re: Fixing up a used M2
Posted: Mon Feb 15, 2016 5:06 pm
by Karl_Williams
I think it's 2-in-1 for the round rods on the Z-Axis and greasing the X and Y linear rails and Z threaded rod with white lithium?
Re: Fixing up a used M2
Posted: Mon Feb 15, 2016 5:20 pm
by ericthered
And all this time I thought the fans were the source of the noise...not the guards. Life has been changed.
Also this is a really cool post. Thanks for sharing!