Page 2 of 3
Re: How To: Z-Stop & Bed Leveling
Posted: Fri Oct 23, 2015 3:13 am
by Jules
Just level it using that diagram.....seriously, mine has never been flatter. Takes about 2 minutes. (And that is a
really big deal, since the first time i had to level, it literally took all afternoon. I kept turning the screws the wrong way, and was trying to level it using the wizard in s3d.)
That diagram makes it simple simple, simple.

Re: How To: Z-Stop & Bed Leveling
Posted: Fri Oct 23, 2015 4:07 am
by 3dPrintingMD
I actually followed this and did what I believe to be pretty good. Did the bed level printout as well, I think its pretty damn close to perfect.
Side note, in those pics I see you have an octopi setup, you have any writeups on that ? I'm in the process of building one.
Re: How To: Z-Stop & Bed Leveling
Posted: Fri Oct 23, 2015 3:05 pm
by ednisley
3dPrintingMD wrote:Seriously, how level is level within reason ?
For a 0.20 mm thick thread, the bed must be level to within ±0.10 mm across the entire surface
and the Z offset must be dead on.
If one side is high by 0.20 mm, then the nozzle will be pressed firmly against the platform and can't extrude any plastic.
If one side is low by 0.20 mm, then the thread won't even touch the platform and can't adhere.
Within the ±0.10 range around the ideal Z offset, the print quality will range from overstuffed to perfect to scanty. Assuming you've done a good job setting up the filament diameter and Extrusion Multiplier, then platform alignment controls nearly everything.
When you think you've got it properly aligned, print five thinwall boxes and measure their height: they should all have the correct height to within ±0.10 mm.
http://softsolder.com/2015/09/04/thinwa ... er-images/

Ideally, you want alignment within ±0.05 mm across the entire platform, but that requires both patience and a careful touch.
Re: How To: Z-Stop & Bed Leveling
Posted: Fri Oct 23, 2015 3:33 pm
by Jules
ednisley wrote:
For a 0.20 mm thick thread, the bed must be level to within ±0.10 mm across the entire surface and the Z offset must be dead on......
.....Ideally, you want alignment within ±0.05 mm across the entire platform, but that requires both patience and a careful touch.
Just for kicks, I like to look at those tolerances on my calipers. Kind of awe inspiring. (Or terrifying, depending on your perspective.)

Re: How To: Z-Stop & Bed Leveling
Posted: Fri Oct 23, 2015 3:34 pm
by sthone
3dPrintingMD wrote:I actually followed this and did what I believe to be pretty good. Did the bed level printout as well, I think its pretty damn close to perfect.
Side note, in those pics I see you have an octopi setup, you have any writeups on that ? I'm in the process of building one.
I don't have a write up on octopi but I just followed this
Youtube Video, it's pretty straight forward and not that hard to do.
-Steve
Re: How To: Z-Stop & Bed Leveling
Posted: Fri Oct 23, 2015 5:53 pm
by ednisley
Jules wrote:I like to look at those tolerances on my calipers
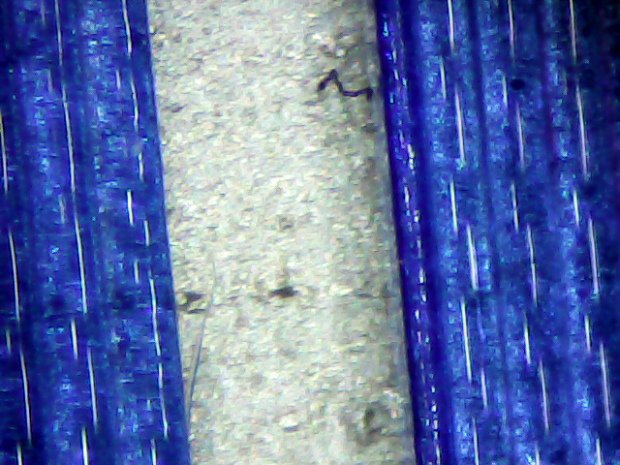
The hair on my head is 0.03 mm, beard hairs measure 0.06 mm, and a mustache hair bulks out at 0.11 mm.
I use those examples when I do 3D printing presentations:
nobody thinks platform alignment can be
that critical... [sigh]
Re: How To: Z-Stop & Bed Leveling
Posted: Fri Oct 23, 2015 6:14 pm
by Pekish79
bed level is crucial especially when u print flat big area like architecture i practically check it every couple of prints
the base of this model was 23x18cm

the bed need to be leveled at perfection to print such large areas
Re: How To: Z-Stop & Bed Leveling
Posted: Fri Oct 23, 2015 6:28 pm
by 3dPrintingMD
All good info.
I have experience working on a vertical mill, so I play in the .001" territory at times, and easily drive myself crazy about things.
Tonight I am going to put a dial on it, just for the sake of knowing, and will just see how close I am. I will not bother if I am within +/- .1mm (I personally think its currently out by about half that).
Re: How To: Z-Stop & Bed Leveling
Posted: Mon Nov 16, 2015 5:16 pm
by 3dPrintingMD
I wanted to re-visit this post and add some, what to me, is good info.
I rather not admit how much time I spent this weekend working on bed-leveling. I got a new print surface, so this was something I checked and ran into issues.
I used a dial on the bed, and kept coming up with what I would call weird inconsistencies. In short, the back left and front right corner were both too high/or higher than the other 2 corners.
I went so far as to take the entire bed off, and check for levelness. It was pretty damn flat. So I decided that I would print out new bed corners and see if that helped.
Low and behold, when I was installing the new corners, I measured the rubber ones that I pulled off. HUGE INCONSISTENCIES (in terms of getting a bed level). The two corners I was having issues with were thicker (+.3mm) than the other two corners.
Obviously when you're printing at say .2mm, a difference of .3mm in table height at certain points is going to cause issues, or at least show itself.
Re: How To: Z-Stop & Bed Leveling
Posted: Mon Nov 16, 2015 6:43 pm
by PcS
What's your print surface ? Glass is not as flat as some believe.


 the bed need to be leveled at perfection to print such large areas