Page 1 of 2
A Bed Spring
Posted: Mon Dec 01, 2014 4:10 am
by Mike Hunter
I finished printing this PLA "spring" which, when testing is complete, will keep the Z Axis/Bed from hitting the motor when the motor's disabled. I'm also hoping that the spring's position under the bed frame will remove some of the "bending" tension that occurs from having the weight of the bed and bed heater so far from the Z axis screw and rods. Might just be my own perception, but it can't hurt.

Sorry for the poor picture quality.
This pic shows the bed dropped onto the spring, leaving a small gap between the motor and bed frame. When I dis-engaged the motors, the bed had my cell phone on it to simulate a printed project's weight.
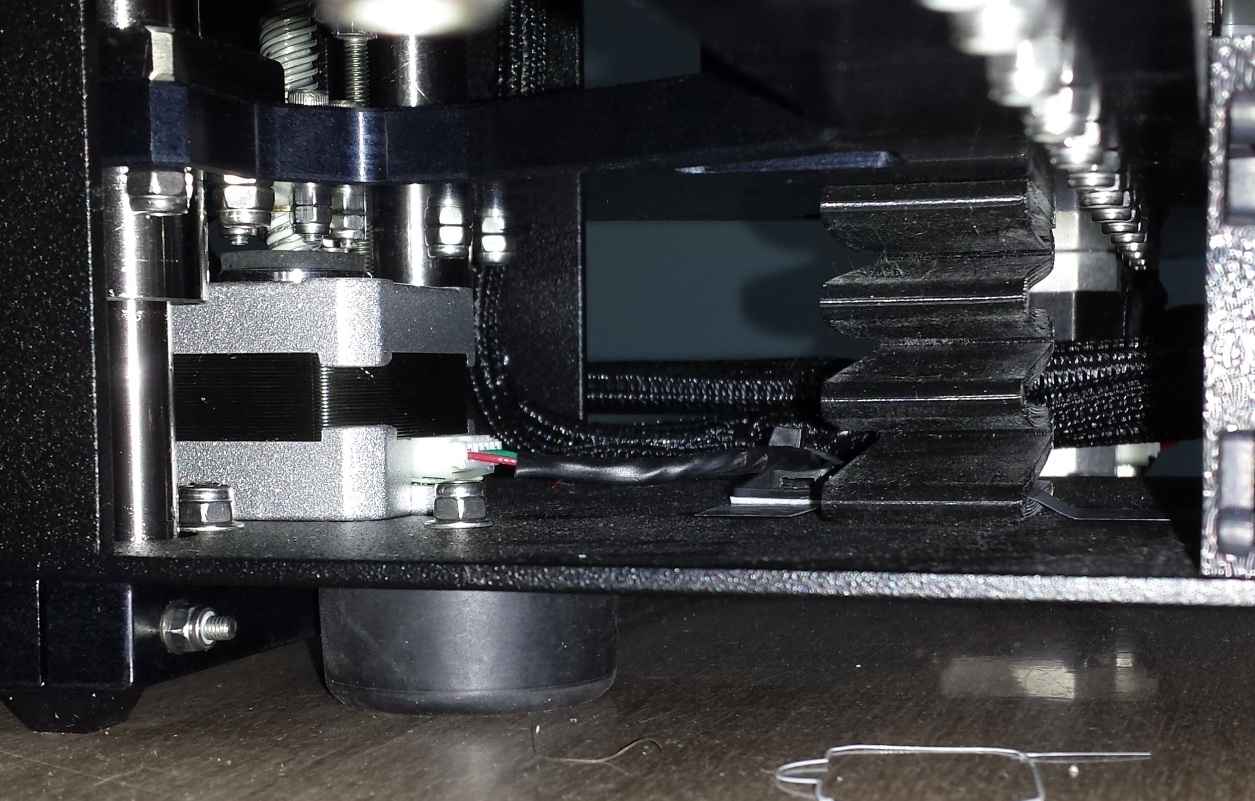
- The Spring in use
- 20141130_151811.jpg (378.81 KiB) Viewed 19902 times
I may have to revise the design as some of the sections have split along the long axis. Testing will continue ...

Mike H.
Re: A Bed Spring
Posted: Mon Dec 01, 2014 4:47 am
by jimc
hahahaha thats so simple its genius. many of us have put rubber bumpers on the z screw or altered the end gcode to lower the bed, etc. never thought of a printed plastic spring. nice thinkin
Re: A Bed Spring
Posted: Mon Dec 01, 2014 5:35 am
by Capt. John
Good idea, double faced tape to hold it in place and the spring is a done deal.
Please shared the file when you have it perfected.
Re: A Bed Spring
Posted: Mon Dec 01, 2014 10:16 pm
by Mike Hunter
THANKS guys:
I'm revising and printing a new spring and will upload the file before the end of day Wednesday.
Mike H.
Re: A Bed Spring
Posted: Mon Dec 01, 2014 11:53 pm
by MG_MLS
jimc wrote:hahahaha thats so simple its genius. many of us have put rubber bumpers on the z screw or altered the end gcode to lower the bed, etc. never thought of a printed plastic spring. nice thinkin
I second the altered ending gcode! I printed an one of my early g-code files the other day that I had stored on Octoprint, and at the end the bed slammed down- I forgot how much that sucks!
A spring would have been nice to prevent that!
Revision B off the printer
Posted: Tue Dec 02, 2014 9:53 pm
by Mike Hunter
Afternoon:
I just finished printing the Rev B spring and it looks like it'll work a bit better than Rev A.
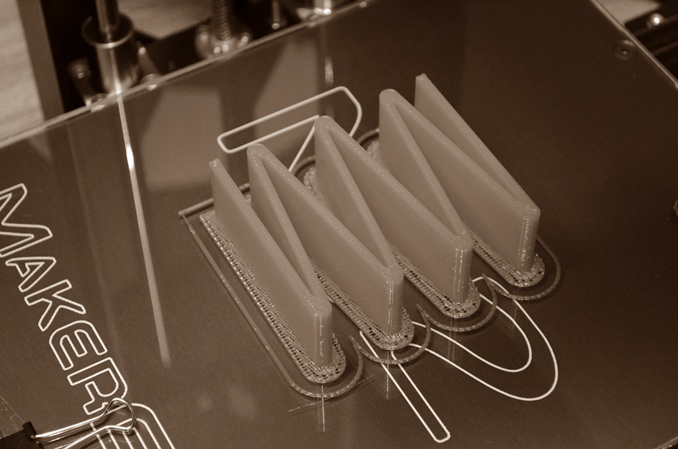
- The finished print before separation. The lack of color makes it easier to see the red filament
- DSC_0634.JPG (119.72 KiB) Viewed 19825 times
I placed it on the machine and ran a couple of "drop" tests using an empty glass and my cellphone as (simulated) weight. Looks like it'll keep the bed higher than Rev A and the splitting hasn't appeared yet.
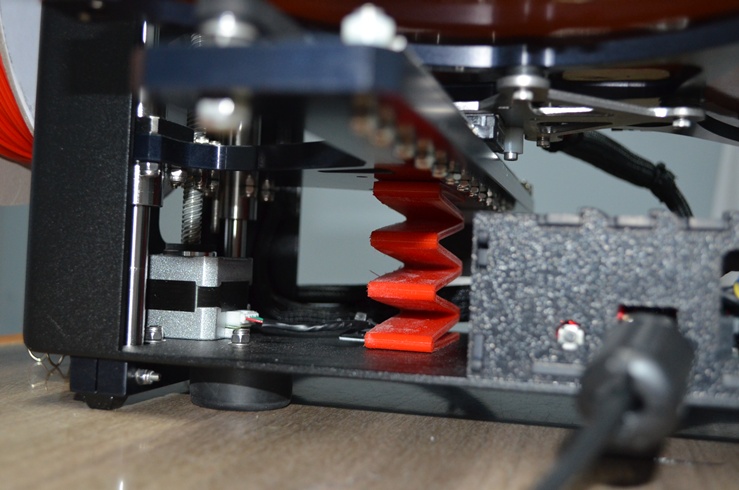
- In place and working as planned ... so far
- DSC_0635.JPG (146.84 KiB) Viewed 19825 times
I'll attach the "factory" file for those using S3D, the .stl file and a .txt file with the S3D parameters for those not using S3D.
Well, apparently I need to revisit the procedure for attaching files other than .jpg as I keep getting a "The extension ... is not allowed". It bombed for both the .stl and the factory file. I'll get those up as soon as I can.
Mike H.
Re: A Bed Spring
Posted: Tue Dec 02, 2014 9:57 pm
by insta
I think the standard is to use .zip instead
Re: A Bed Spring
Posted: Wed Dec 03, 2014 4:11 pm
by Mike Hunter
THANKS for the tip insta:
Here are the files I used for the Rev B Spring should anyone wish to give it a try ..
Mike H.
Re: A Bed Spring
Posted: Tue Mar 03, 2015 4:40 pm
by Jules
This thing is
pure-D-spectacular Mike! It was the second thing I printed, after the Z-axis wrench set, and now I don't have to dart across the room to catch the bed when it drops! (Don't know how to modify G-code yet.)
I printed it using the settings below. (Picked it up off Thingiverse instead of seeing your zip here with the S3D settings.
Really wish I'd seen your S3D code.

)
PLA, 218°/0°, 3 perimeter layers, 50% infill, and because i was already having trouble with the PLA warping a bit and I wanted this to print perfectly flat....a 3-layer brim - 10 wide on hairsprayed glass.
Now let me warn other beginners about what
NOT to do......
never, under any circumstances, use a 3 layer brim on your print, unless you want to spend as much time carefully carving it away as it did to print the object in the first place! (Oh well, it
did stick to the bed.)

I attached it to the bed with Terrifically Tacky tape (red liner) and it really delivers! Many thanks!
Re: A Bed Spring
Posted: Sat Apr 11, 2015 2:31 pm
by Mike Hunter
Thanks jules
Mike H.