Page 1 of 3
Adventures in plaster casting
Posted: Sat May 17, 2014 11:26 pm
by jsc
Intrigued by
Toby's plaster cast experiments, I decided to have a go myself.
I started with Toby's mold files, which he graciously shared with me. It is a clever puzzle-like contraption with a lot of pieces that de-mold very easily, but is a tad fiddly to set up:
- toby-box.JPG (146.65 KiB) Viewed 13843 times
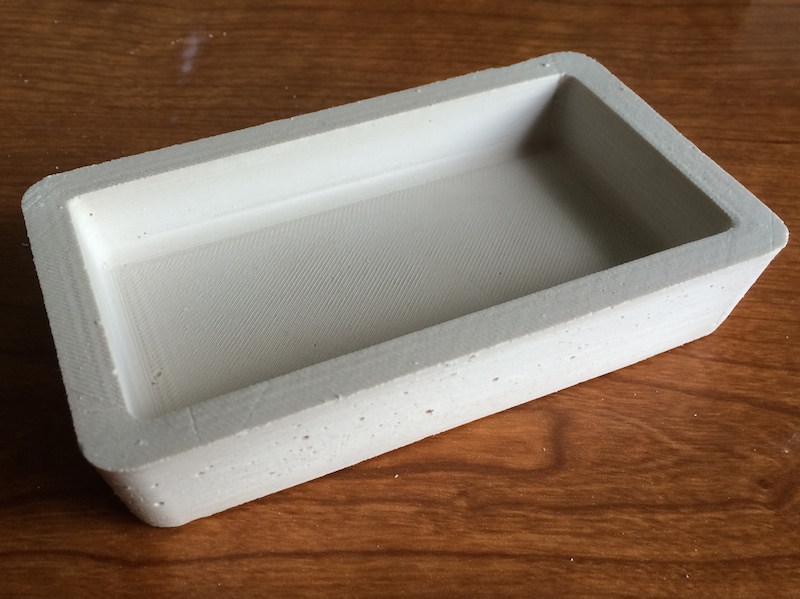
I decided to see if a simpler arrangement could be made to work, with enough draft angle and generous amounts of paste wax as a mold release. I modeled a simple box model, then differenced it to get a mold negative, and attached the results to base plates with alignment mortise and tenons:

- mold parts.jpg (171.24 KiB) Viewed 13843 times
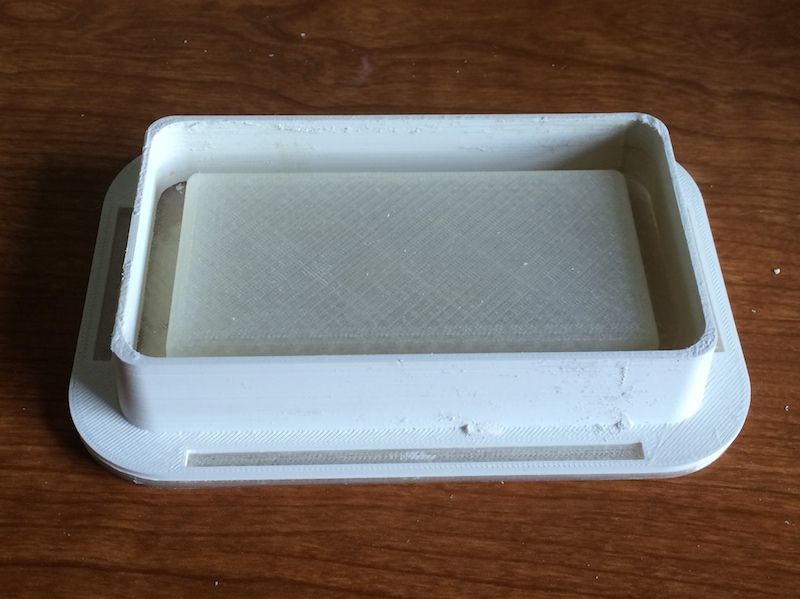
- mold assembled.jpg (153.5 KiB) Viewed 13843 times
One thing I learned is that prints with interior curves on overhanging surfaces like to short cut the corner and drop threads, but I removed those and filed down the surface a little to get rid of most of the irregularities.
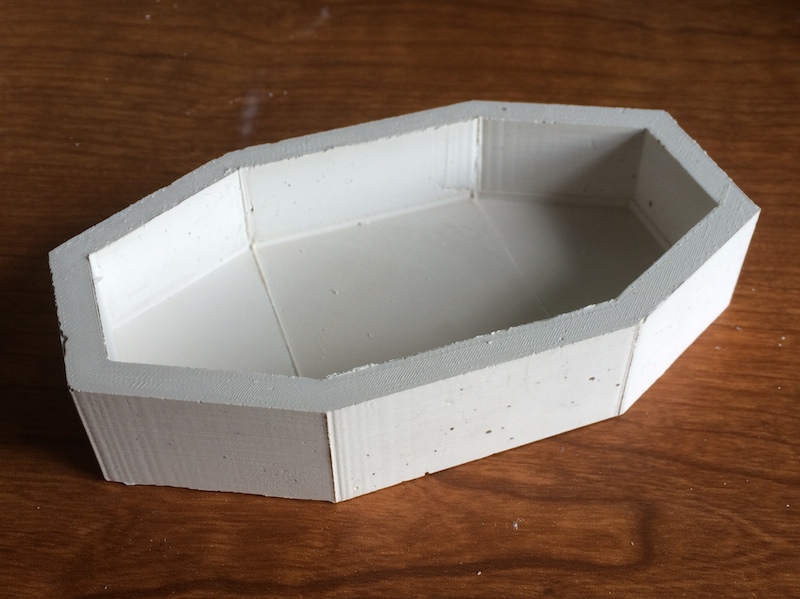
The first cast:
- cast.jpg (157.56 KiB) Viewed 13843 times
My mixing and pouring technique is a bit slapdash, so it's a little too wet and there are visible air bubbles, but otherwise, not too bad! Unmolding was tricky, but some gentle prying and bending got it out in one piece.
Re: Adventures in plaster casting
Posted: Sun May 18, 2014 3:44 am
by Toby
Nice, Jin. I think having the "wings" on the mold (where the two pieces attach) is a good idea not only for a simpler mold but also for releasing the cast. It looks like it would help by allowing leverage there without directly touching the plaster.
One thing that helps with the bubbles is to first coat the inside of the mold with a thin layer of wet plaster before pouring. When you have direct access to the inside you can use a brush, or else just tilt the mold this way and that to get a nice coating.
If you sand your cast with a fine grit after it dries and apply some diluted elmers to the surface you'll get a really nice finish on it.
The only downside I can see is it looks like the bottom portion of the mold has a lot of infill involved to get to the top surface of it. For large molds it would make the printing slow. But since all you really need is the surface of the mold, I think you could avoid the infill by splitting that part into two pieces that fit together to form the same shape but without anything on the inside of it.
Re: Adventures in plaster casting
Posted: Sun May 18, 2014 4:08 am
by jimc
that is great jin. coming from a marine industry background i have done my share of making molds and casting things but never with plaster. i have to ask you and toby what you can use a plaster piece for? would the plaster part be your final, usable piece or is the idea to use the plaster as a final mold for something else? again not that i have messed with plaster but it doesnt seem like a durable material so basically what is the ultimate goal of this whole process?
Re: Adventures in plaster casting
Posted: Sun May 18, 2014 4:13 am
by jsc
Toby wrote:The only downside I can see is it looks like the bottom portion of the mold has a lot of infill involved to get to the top surface of it. For large molds it would make the printing slow. But since all you really need is the surface of the mold, I think you could avoid the infill by splitting that part into two pieces that fit together to form the same shape but without anything on the inside of it.
Actually, the bottom portion is hollow! I shelled it out. No supports required, it just bridges, and that happens on the non-mold side so the quality of the bridging doesn't matter.
Re: Adventures in plaster casting
Posted: Sun May 18, 2014 4:22 am
by jsc
jimc wrote:again not that i have messed with plaster but it doesnt seem like a durable material so basically what is the ultimate goal of this whole process?
Funsies.
Gypsum (plaster of Paris) is, like, a 2 on the Mohs scale, so you're right, regular plaster isn't very durable. I'm not sure what is in the "Art Plaster" I'm using, but the box says it is "far superior to standard plaster of paris," for what that's worth; I'm sure it must be true. The Permastone stuff that Toby uses is more like a cement, I gather, and much more durable.
It's certainly suitable for ornamental objects, and nice to be able to say "I printed THIS" (sort of...). Also, a powder that turns into a hard rock-like substance when you add water is just a teeny bit magical.
Re: Adventures in plaster casting
Posted: Sun May 18, 2014 4:28 am
by jimc
hahahaha magical

ok i see. just for fun. nothing wrong with that. i thought maybe there was a specific reason you were doing it.
Re: Adventures in plaster casting
Posted: Sun May 18, 2014 6:02 am
by Toby
It's ornamental. A different way of making art. Plaster has a nice feel and look I think, sort of like stone. But as far as being functional, not really. Though the bowls I made with permastone are quite strong and useable as non-food containers. They finish nicely with oil paint and shellac.
The other reason is for experimenting with making molds directly with a 3d printer, for use with other materials, like ceramics or metal clay. Plaster is easier because you don't have to fire it, but I think much of what is learned with plaster will apply to ceramic. My interest is mostly the art angle, but ceramics is a useful material in its own right.
Re: Adventures in plaster casting
Posted: Sun May 18, 2014 6:04 am
by jimc
gotcha!
Re: Adventures in plaster casting
Posted: Sun May 18, 2014 6:34 am
by Toby
jsc wrote:
Actually, the bottom portion is hollow! I shelled it out. No supports required, it just bridges, and that happens on the non-mold side so the quality of the bridging doesn't matter.
Excellent. What's the scale? I've never tried bridging anything more than about 5 mm.
Re: Adventures in plaster casting
Posted: Sun May 18, 2014 7:38 am
by jsc
The bridged area is ~100x50 mm. Of course it bridges the short way across.