in my personal experience i've gotten more detail out of my replicator 1 then my m2, even though the tip f the r1 is .05 larger.
its not that you cant get detail from an m2, its not a problem, its a just a relative thing. I've defiantly gotten good results from the m2 .. but if i am printing some fine small details, my goto is still the r1
with no actual proof to back this up...i've attributed it a bit to the shape of the tips. where the m2's tip tends to have a relatively larger flat area round the hole in the tip, which can cover mask some calibration errors at the expense of making a layer wider. so i have assumed its self inflicted and a matter of me just spending more time dialing things in more.
To be fair, my r1 is far from stock....and was no where near having the ability to print as good as it does now stock. i made many changes to the r1... i've seriously beefed up the parts in the r1, including things like metal arms for the heated bed, 1/4" aluminum tooling build plate upgrade to the rod holders and so on. even adding weight to the frame itself to keep vibrations to almost nil.. . I Haven't tried slowing down the m2 and seeing i i can get equal or better results.
there are threads on the flex in the Z axis on the m2, so maybe slowing down might make the difference.
seems like an interesting experiment, have to see if i get time to play this weekend
i am using s3d slicer now for both the m2 and the r1 so tis not a slicer difference.
How to improve fine detail print quality of the m2?
Re: How to improve fine detail print quality of the m2?
M2 - MKS SBase w Smoothieware, GLCD, 24v, Upg Z & extruder stepper - IR bed leveling, Astrosyn dampers X/Y/Z, MIC 6, Zebra, PEI, & glass Build Plates - E3D, V3B Hotends, & more - many other 3d printers - production printing.
Re: How to improve fine detail print quality of the m2?
Now that I think about it, the M2 is definitely "leakier" than the Replicator 2x - that is - it leaks during retraction while the replicator largely doesn't (Only with PLA does it leave threads galore, but they're usually wispy.). I can usually resolve this with a -.2 to -.3 mm restart distance, so I'm guessing this lack of ability to do the fine/thin column-like features might be caused by M2's retraction 'leakiness'. I should probably try out one of my thorny models to print on the M2 and see if that solves it.ednisley wrote:You're (trying to) print something two threads wide at 50 mm/s and you wonder why the nozzle pulls a high-aspect-ratio pile of viscous goo off vertical? There's no possible mechanical slop affecting that problem that wouldn't show up elsewhere; it's all in your slicer settings.swbluto wrote:momentum of the motor during higher speed maneuvers

Re: How to improve fine detail print quality of the m2?
If you are using S3D, you don't have to reduce the speed of the entire print to reduce the speed for tiny extrusions like text on the surface. In the Cooling tab, you can set limits on the speed that the machine will use for tiny surface extrusions, based on how long it takes to print that layer:...I'm not going to slow down my entire print to 1mm/s to compensate for this...
Lower the default 20% even further to slow it down for just the little protruding bits.
- Change the 20% default to 4% to reduce the speed further. Increase the 15 seconds to 20 seconds to give a larger margin of error.
- Less than 4mm/sec on text.
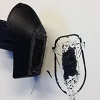
Just for kicks, I whipped up a little file for an extruded cylinder that was 0.8mm diameter and 20.0 mm tall. The M2 had no trouble printing it perfectly. (Pics below.)
Printed in PLA with 1.0 mm retraction, no extra restart, 0.2mm retraction vertical lift, speed reduction down to 4% on layers less than 15 seconds, and forced retraction between layers.
Actual cylinder diameter came out to about 0.73 mm, because of the centering pull effect on circles, but it still printed just fine.
Re: How to improve fine detail print quality of the m2?
And that pretty much puts an end to that. Thanks Jules. Just goes to show with a little effort and thought the M2 can handle it. People don't spend enough time dialing in their filament settings etc in my I opinion and this is a good example of why they should.
Awesome
Awesome
Re: How to improve fine detail print quality of the m2?
Definitely agree that it's a pretty powerful thing once you learn what all the little S3d settings do. All I had to do to print that hairbrush bristle was change one setting from 20% down to 4%. The rest are my standard print settings.
(And i was honestly expecting it to get knocked over....surprised it didn't. But it's still firmly attached and somewhat flexible because it's so freaking small.)
For that matter, you could leave that setting at 4% in your profiles all the time - I don't know why they chose 20% as a default. If you are doing really detailed work, you would want it super low. (Maybe it's a heat build up thing.)
Anyway, it was a fun experiment. I've never had to print anything that small before. Now i know i can. Coolness!
(Of course, now you realize, I'm going to have to see how tall i can take it before it breaks or topples. My favorite game. )
)
(And i was honestly expecting it to get knocked over....surprised it didn't. But it's still firmly attached and somewhat flexible because it's so freaking small.)
For that matter, you could leave that setting at 4% in your profiles all the time - I don't know why they chose 20% as a default. If you are doing really detailed work, you would want it super low. (Maybe it's a heat build up thing.)
Anyway, it was a fun experiment. I've never had to print anything that small before. Now i know i can. Coolness!
(Of course, now you realize, I'm going to have to see how tall i can take it before it breaks or topples. My favorite game.
Re: How to improve fine detail print quality of the m2?
i really need to go hand out candy to some little spooks.....
Looks like 50 mm tall is a good conservative number for 0.8 mm diameter. It prints fine up to 60 mm or so, but after that it develops a little wiggle that multiplies as the column gets taller.
Really pronounced at 120 mm, but the column is still standing, which is amazing. (And that's far enough.)
Well, that was fun....Happy Halloween!
Whoooooooo-ooooooooooo-oooooooooooooooo!
- Printing at about 80-90 mm.
- 20 mm, 40 mm, 60 mm and 120 mm
- wiggle wiggle wiggle
Re: How to improve fine detail print quality of the m2?
Just to clarify, this works if there's other large areas in the same layer? In my typical application, there's a large boundary with some large areas here and there, and some fine text here and there. I get the sense this only works if the thin-column is the only thing existing at a given layer.
Re: How to improve fine detail print quality of the m2?
It should work regardless. Perhaps you could provide us an example of what you are printingswbluto wrote:Just to clarify, this works if there's other large areas in the same layer? In my typical application, there's a large boundary with some large areas here and there, and some fine text here and there. I get the sense this only works if the thin-column is the only thing existing at a given layer.
Re: How to improve fine detail print quality of the m2?
For example, this fine text that goes like "Since 1909".
Just about every one of those letter is essentially column-esque enough at this size. (They're two .35mm threads thick for the most part.)
Re: How to improve fine detail print quality of the m2?
Nope. Absolutely not going to work in that circumstance, since the larger infill in your other areas is going to bump up the total layer time above the threshold. For that you would have to lower the overall print speeds.
Use your other machine for that if it works better. (Since you have both.)
Use your other machine for that if it works better. (Since you have both.)