I've been doing something ever since i ran into a roll of really brittle PLA filament that was breaking on me in the middle of prints, and I didn't realize that not everyone has had success doing it. It's a method of re-feeding the filament into the drive so that the print is not interrupted, and it works very well for me with PLA filaments. (I'm not sure if it's going to be as successful with ABS or PETG, although i might try a PETG test with it next. Those are a lot more flexible so they might not work as well.)
(Update:
Yes it does work for PETG as well, but there is a special trick to it. The PETG process will be described a couple of posts down.)
You might use this technique if you're getting towards the end of a spool, and you want to make sure you have enough filament to finish your print. Or you can use it to change colors without pausing the print - it does not give you as much control over where the color change is going to land on your print, (as does changing the G-code to insert a pause at a specific layer to switch the filament), but you can still get some rather neat effects.
Okay, so on to the test:
I wanted to make it challenging so i deliberately spliced a Hatchbox green PLA filament into a silver ESun PLA based box that i worked up for the purpose. They are not the same diameter, but i wanted to see if it made any difference. (It didn't. The green was 1.75 mm diameter, the silver was 1.72 mm diameter. Neither caused a problem when it was fed in. And the exterior and interior of the printed box are perfectly smooth. I was expecting a slight raised edge when the green band was introduced since the diameter of the filament was different, but it didn't happen - probably a measly 0.03mm difference in the diameter is not enough to make a difference.

)
Here's what you do:
First, prep your replacement filament for insertion. (Or the new spool you plan to feed in.) Do this by cutting a completely
straight/even/flat edge on the end that will be fed into the machine. (Do not try to trim the end at an angle.)
Like this:
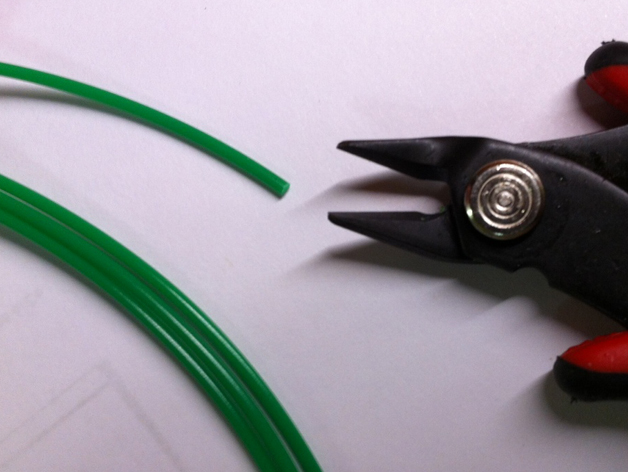
- Cut the end flat on the filament.
- Cut End.jpg (184.47 KiB) Viewed 20523 times
Next, gently straighten the end that will be fed in. Doesn't have to be perfect, but it makes for an easier insertion:
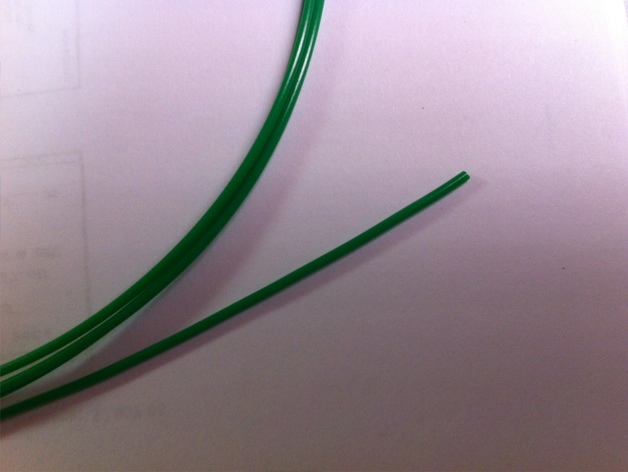
- Straighten End.jpg (195.22 KiB) Viewed 20523 times
Step three is to cut the end on the filament that is currently in the machine. You can cut it at the spool to give yourself a bit more working time, or you can loosen the tension on the spool a little bit, and pull back the clear guide tube at the filament drive end, and cut it there. (If you choose the second option, have your other filament ready to go.) When you cut the filament, make sure that you
cut a flat end on the portion that is still in the machine.
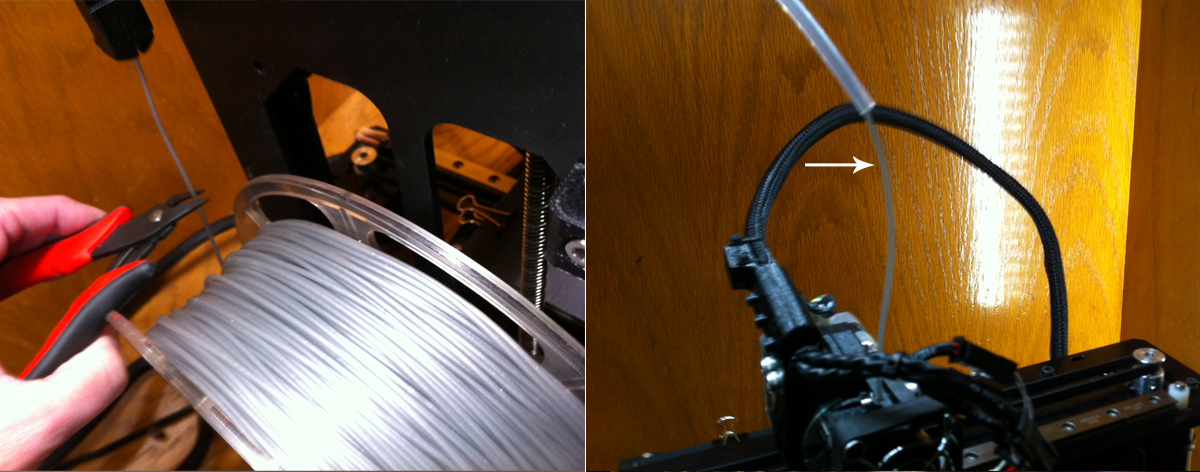
- Make sure the end still going into the machine after you cut is flat.
- Cut printing filament.jpg (461.75 KiB) Viewed 20523 times
At this point, if you are changing the spool, remove the filament still attached to the machine from the clear tube. (Just pull the loose end up through the clear guide tube and out from the filament drive end, without sticking it into your fan.

) Remove the old spool, put the new spool on the holder, and feed it up through the clear tube and out the other end
by several inches, so that you can grab the filament where it comes out of the clear tube.
When the disappearing filament looks like this, get ready to feed the new filament in. As soon as the old filament strand clears the top of the filament drive, you want to follow it in by inserting the new filament end. The ends of both filaments should be flat, they will fit together seamlessly.
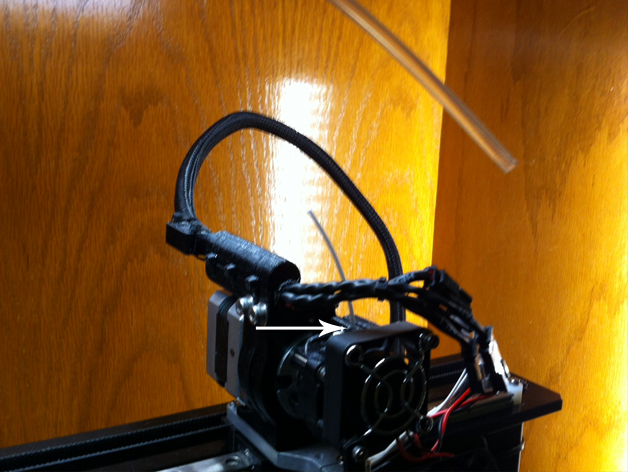
- Get ready to feed in your new filament.
- Get ready to feed.jpg (258.76 KiB) Viewed 20523 times
Feed in the new filament, and be prepared to maintain a slight downward pressure on the filament for
up to a minute or two, depending on how fast you are printing, and whether or not you are printing infill (which does not move as much material) or printing solid layers (which moves it pretty fast.) You need to give the filament in the nozzle time to be extruded and the new filament time to move into place, and you
have to keep light downward pressure on it until it happens. That also means you are going to chase around after the print head - i do apologize for the quality of the photo - but that print head is moving.
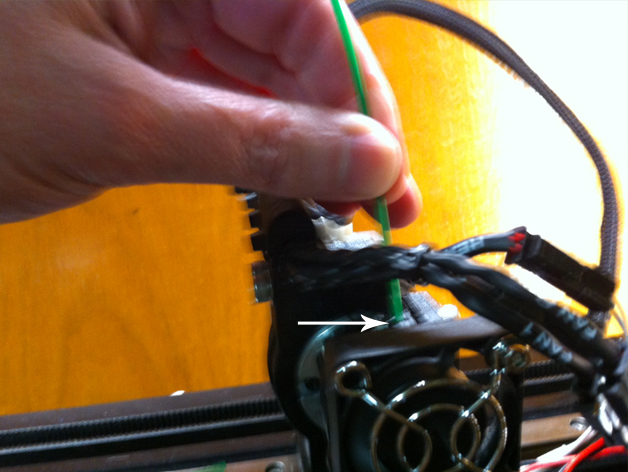
- Pressing down while it prints. Tricky but fun!
- Feeding in new filament.jpg (228.57 KiB) Viewed 20523 times
You might feel the new filament catch, you might not. I usually do, but not always. If you don't feel it catch, don't let go, keep maintaining the downward pressure for another minute. If you are using a different color, you will see it start to extrude from one to three minutes after you feed it in. Or you can use the movement of the clear tube to see if the new filament has caught. The end of the clear tube will start to move towards the filament drive as the slack gets taken up in the filament.
Continued in next post.......


