That's a great idea in theory, but how does the bed height vary between PEI sheets? It's hard to imagine there's less than .02mm variance in PEI sheet thickness. Now, if the amount of "acceptable variance" is /much/ higher than glass, that might make it a non-issue. I know with glass, I can't have the bed height vary by more than .02-.04mm or otherwise visual defects start to appear in the bottom layer of ABS prints (PLA is great in this regard). So, how is the 'acceptable variance' in bed heights with PEI sheets when used with ABS? If you get too close, do you get those awful markings in the bottom as well as much higher chance of ABS lifting and burning leaving a dark mark in the color?Farr0wn3d wrote:If you're in a production environment I would run multiple sheets and since all I have to do is remove clips to take off the PEI, you could toss on another one and away you go. the bed adhesion is incredible, I used to always have some degree of lifting off the bed, however small, or small support structures coming unstuck during a print but now that I have the PEI dialed in theres none of that. to me its actually better to do that option in a production role because you can replace the sheet with a ready one and probably even get printing faster, and with less failed prints due to bad adhesion
PEI Bed Surface
Re: PEI Bed Surface

Re: PEI Bed Surface
thats a good point, I cant really speak to the variance in thickness from piece to piece, and I don't print with ABS so I don't have much more useful input for you

Re: PEI Bed Surface
That might be a case for the Nisley fixed-frame endstop tee-em.
Custom 3D printing for you or your business -- quote [at] pingring.org
Re: PEI Bed Surface
go on...

Re: PEI Bed Surface
The general idea is to have the Z-axis switch sense the top of the platform, rather than a bolt off to the side that requires constant putzing to adjust.Farr0wn3d wrote:go on...
Then it absolutely does not matter what you do to the build platform, because the switch senses the actual top surface of whatever you've got on there and sets the Z=0 position accordingly.
The first writeup describes how it works:
http://softsolder.com/2013/10/14/makerg ... in-switch/
The next version required a bit of Quality Shop Time to accommodate the V4 hot end, which sits slightly higher on the extruder carrier:
http://softsolder.com/2015/03/10/makerg ... is-switch/

You could just drill some holes and bend some sheet metal to the same end; I happen to have a pretty good collection of tools & materials.
In both cases, the switch sits slightly higher than the nozzle (which must be true, otherwise it'll hit the object you're building!), so the startup G-Code must move the nozzle off to the right side before homing the Z axis. When the Z-axis switch trips, a G92 command sets the Z coordinate to the offset between the nozzle and the trip position: -2.0 mm for that lashup.
To adjust the initial Z offset, I just tweak the startup G-Code. I think you can accomplish the same thing using the Z offset in S3D or Slic3r, but it boils down to the same command doing the same thing. Because the switch stays in the same position, if I must change the initial Z offset by, oh, 0.05 mm, that actually happens: I can measure exactly that difference in the before-and-after calibration boxes.
The M2 is stable enough that the Z offset remains the same for weeks on end; offhand, I don't recall when I last changed it. This technique does require re-slicing objects when you change the offset, but that's not a problem for the way I work; generally, I build one-off widgets that require model changes & slicing for every iteration, so I always slice before printing.
Works for me, anyhow.
Re: PEI Bed Surface
It's a delightfully elegant solution that's bested perhaps (in theory, not in practice) by force-sensing-resistors on the hotend itself. It can even handle Y misalignment on the bed with probing, it just can't do any X adjustment since it's fixed in place. Hopefully the new spider can get the bed leveling rock-solid, and the combination of the two will make for hundreds of starts with consistent behavior.
Custom 3D printing for you or your business -- quote [at] pingring.org
Re: PEI Bed Surface
That would be a neat hack and certainly simpler than, say, strain gages + amplifiers: sensing directly through the nozzle, with enough sensitivity to avoid a crash, would be ideal!insta wrote:force-sensing-resistors on the hotend itself
Having the nozzle probe the actual surface, rather than a magnetic field related to some part of the platform, is the way to go...
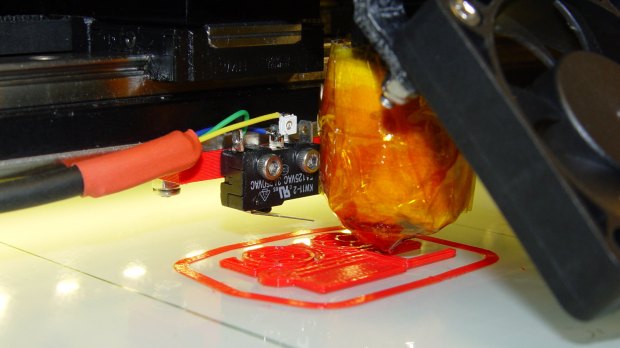
The platform in that photo isn't a stock MG part: it's a PCB heater bonded to a sheet of borosilicate glass with high-temperature 3M tape, resting on three studs lined up with the holes in the Y axis carrier. I put silicone slugs inside the MG wavy springs, tightened the nuts, and it's been stable ever since (modulo having one stud pull out):Hopefully the new spider can get the bed leveling rock-solid
http://softsolder.com/2013/10/10/makerg ... djustment/

The downside of not being able to remove the glass balances out against rarely fiddling with the platform alignment: it's been going strong for the last two years!
-
creativedex
- Posts: 28
- Joined: Thu Oct 15, 2015 8:32 am
Re: PEI Bed Surface
Im considering getting a 1/8 or 1/4 inch sheet of PEI and just clipping it on the bed with larger clips... does anyone know if thicker sheets warp with the high temps of the bed? or do you go with thin sheets in hopes of getting it as flat as the glass? Sounds like there is an issue of getting good adhesive tape to mount it level anyway so figured why not just skip it all together. It will certainly take longer to transfer the heat to the thicker PEI but heat rises well on its own... it will most certainly require a band saw to cut!

Re: PEI Bed Surface
i think the all point of sticking to the glass is to avoid bending i am pretty sure that alone even 1/4 will tend to curve and since the tolerance for printing is very small I am not sure it will work as good as the one over glass... i never had problem sticking it which tape are u using? the one they suggested here worked perfectly and i use it over glass and over zebraplate too
3M 486MP tape i bought the 2" large so i had only to make 3 stripe of 2" each to cover the all 8" plate
3M 486MP tape i bought the 2" large so i had only to make 3 stripe of 2" each to cover the all 8" plate
-
creativedex
- Posts: 28
- Joined: Thu Oct 15, 2015 8:32 am
Re: PEI Bed Surface
Ive not tried PEI at all just been doing my research and havent found anyone thats used over 1/8 sheets.. I noticed there is Ultem 2100- 2400 which is fiberglass reinforced PEI sheets in varying percentages that sound promising to prevent warping but i cannot find it sold anywhere with out emailing for a quote... which most certainly means large sheets only. I read in a lutzbot forum that 1/8 sheet warped and was so stiff that it pulled up the glass as well.
Sent these guys an email with a few questions... (see the link for more info on the reinforced sheets)
http://www.apexco-ppsi.com/pei/
Sent these guys an email with a few questions... (see the link for more info on the reinforced sheets)
http://www.apexco-ppsi.com/pei/